In March 2025, a contractor in Zhejiang province started a 40-meter bridge pile project with 200 B47K19H teeth. By meter 25, every tooth was flattened. The ground was harder than expected. He lost three days swapping to B47K22H while his crew waited. The delay cost more than the teeth themselves.
Most contractors do not have a structured process for how to choose bullet teeth. They guess based on price or habit. This article gives you a seven-step workflow that eliminates guesswork. By the end, you will know exactly how to read a geotechnical report, match a tooth model to your ground conditions, calculate how many teeth to order, and verify your choice with a simple field test.
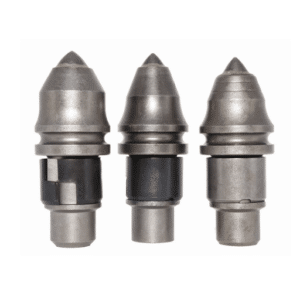
If you are new to bullet teeth, our complete bullet teeth guide covers the fundamentals before you dive into selection.
Why Bullet Teeth Selection Matters

Choosing the wrong bullet teeth is not just an inconvenience. It directly affects your project cost, timeline, and equipment safety.
When you use a tooth that is too small for the formation, wear accelerates by 30 to 50 percent. You replace teeth more often. Drilling slows down. In extreme cases, worn teeth damage the holders, which are far more expensive to replace than the teeth themselves.
On the other hand, over-specifying wastes money. A B47K22H in soft clay costs more per tooth than a C31HD and delivers no performance advantage. You are paying for carbide you do not need.
The real metric is cost per meter drilled, not upfront tooth price. A contractor in Guangdong learned this the hard way. He was running B47K19H teeth in 70 MPa limestone and replacing them every 35 meters. After switching to B47K22H, his replacement interval stretched to 65 meters. The more expensive tooth saved him approximately $12,000 over the course of the project because he spent less on replacements and downtime.
If you want to understand the applications of Bullet Teeth, please check out our article about How Bullet Teeth Are Used.
Step 1: Analyze Your Ground Conditions
The first step in any bullet teeth selection guide is understanding what you are drilling through. Without accurate ground data, every other decision is a guess.
Reading the Geotechnical Report
If your project has a geotechnical report, start there. Look for the unconfined compressive strength (UCS) values listed in MPa. These are usually presented by depth interval. Pay attention to:
- Primary formation types at each depth
- UCS or SPT N-values (you can convert SPT to approximate MPa)
- Abrasive content such as quartz or silica
- Mixed layers, boulders, or transitional zones
A common mistake is looking only at the average ground hardness. If your report shows 20 MPa for the first 15 meters and 70 MPa below that, your selection must account for both layers, not just the average.
Estimating MPa Without a Report
If you do not have a geotechnical report, use these field indicators to estimate approximate ground hardness:
| Ground Type | Visual/Field Clues | Approximate MPa |
|---|---|---|
| Soft clay, silt | Easily penetrated with hand tools | 0-10 MPa |
| Sand, loose gravel | Flows when disturbed | 10-30 MPa |
| Dense gravel, weathered rock | Requires hammer to break | 30-60 MPa |
| Medium-hard rock | Hard to break, crystalline structure | 60-100 MPa |
| Very hard rock | Requires heavy hammer, rings when struck | 100-150 MPa |
| Ultra-hard rock | Cannot break with hand tools | 150+ MPa |
For a more precise estimate, conduct a Standard Penetration Test (SPT) or Cone Penetration Test (CPT) on a pilot bore. These tests provide quantifiable data you can use for selection.
Identifying Mixed Formations
Mixed formations are where most selection errors happen. A layer of clay with embedded boulders, or a sandstone formation with shale interbeds, creates variable cutting resistance. In these cases, you should select the hardest formation you will encounter, not the average. It is better to have slightly more tooth than you need for the soft layers than to fail prematurely in the hard ones.
Step 2: Match Tooth Model to Ground Hardness

This is the core of how to choose bullet teeth. Once you know your ground’s MPa range, matching the right model is straightforward.
MPa-to-Model Selection Table
| Ground Condition | MPa Range | Recommended Tooth | Expected Life* |
|---|---|---|---|
| Soft clay, silt | 0-10 MPa | C31HD or flat teeth | 200-400 m |
| Sand, gravel | 10-30 MPa | B47K19H | 150-250 m |
| Weathered rock | 30-60 MPa | B47K19H or B47K22H | 80-150 m |
| Hard rock | 60-100 MPa | B47K22H or BKH47 | 40-80 m |
| Very hard rock | 100-150 MPa | B47K25H or B47K30H | 20-40 m |
| Ultra-hard rock | 150+ MPa | Switch to roller bits | N/A |
*Life estimates depend on rotation speed, down pressure, and operator technique. Controlled drilling with adequate feed pressure extends life. Aggressive high-RPM drilling shortens it.
Soft Ground: 0-30 MPa
For clay, silt, sand, and loose gravel, you do not need heavy-duty carbide. The C31HD is ideal for soft ground. It is lighter, less expensive, and drills efficiently without excessive weight. For slightly harder mixed soil, the B47K19H provides a margin of safety without overkill.
Using a B47K22H in soft ground is a waste. The larger carbide adds weight and cost with no performance benefit. In soft clay, the C31HD will often out-drill the B47K22H because it penetrates faster with less resistance.
Medium Rock: 30-60 MPa
This is the transition zone where selection becomes critical. Weathered rock, soft sandstone, and dense gravel fall into this range. The B47K19H handles the lower end of this range well. At the upper end, approaching 60 MPa, the B47K22H becomes the safer choice.
If you are unsure where your ground falls within this range, start with the B47K19H and monitor wear. We cover exactly how to do that in Step 6.
Hard Rock: 60-100 MPa
Hard rock demands heavy-duty teeth. The B47K22H, with its 22-millimeter carbide tip, is the standard choice for this range. Its larger cutting surface dissipates heat better and withstands impact more effectively than smaller models.
For contractors running consistently hard rock, the BKH47 is a viable alternative. It uses the same 30-millimeter shank as the B47K22H but with a spring-clip retention system that allows faster field replacement.
For a full breakdown of how bullet teeth perform in hard rock specifically, see our bullet teeth for hard rock drilling guide.
When to Switch to Roller Bits (100+ MPa)
Above 100 MPa, bullet teeth become uneconomical. The cost per meter rises sharply as the tooth life drops below 20 to 40 meters. At this point, roller bits are the better choice. They cost more upfront but last 200 meters or more in hard rock, making them far cheaper per meter.
For guidance on the bullet teeth versus roller bit decision, see our comparison of bullet teeth vs roller bit.
Step 3: Match Teeth to Your Drilling Tool
Different tools place different demands on bullet teeth. The same ground condition may require a different tooth arrangement depending on whether you are using an auger, a bucket, or a core barrel.
Tool-Specific Recommendations
| Tool Type | Typical Tooth Count | Recommended Models | Notes |
|---|---|---|---|
| Soil auger (soft ground) | 12-24 | C31HD, B47K19H | Standard arrangement |
| Rock auger | 16-32 | B47K19H, B47K22H | Larger carbide on outer cutters |
| Drilling bucket | 8-16 | B47K19H, B47K22H | Match to cutting edge sequence |
| Core barrel | 6-12 | B47K22H, BKH47 | Staggered arrangement preferred |
| Casing shoe | 8-12 | B47K19H | For dense overburden |
Rock Augers
Rock augers carry the highest tooth count because the helical flight requires teeth at regular intervals. Outer cutters experience the highest cutting speed and should use the larger carbide model. Inner cutters can sometimes use a smaller tooth if the center rock is softer or already fractured.
Drilling Buckets
Drilling buckets typically use fewer teeth than augers because the cutting action is concentrated at the bottom edge. Match the tooth model to the hardest material the bucket will encounter at full depth, not just the surface layer.
Core Barrels
Core barrels for hard rock benefit from staggered tooth placement. This distributes cutting load and reduces vibration. For core barrel applications, the B47K22H or BKH47 is the standard choice.
Step 4: Verify Holder Compatibility
Even the perfect tooth is useless if it does not fit your holder. Before ordering, verify three things.
Measuring Holder Pocket Diameter
Remove one existing tooth and measure the holder pocket with a caliper.
- 30-millimeter pocket: Accepts B47K series and BK series
- 25-millimeter pocket: Accepts C31HD series
- 19-millimeter pocket: Accepts C21HD
This is the most common ordering mistake. A 25-millimeter tooth in a 30-millimeter pocket will rattle, wear unevenly, and possibly eject under vibration. A 30-millimeter tooth will not fit in a 25-millimeter pocket at all.
Retention System Type
Check how the tooth locks into the holder:
- Circlip: A spring steel ring that snaps into a groove. Most common on B47K series.
- Spring clip: A coil spring that pushes the tooth against a shoulder. Used on BK series.
- Friction fit: Relies on tight tolerance alone. Used on some C31HD holders.
Mixing retention systems on the same tool is not recommended. It creates inconsistent seating depths and uneven wear patterns.
Weld-On vs Bolt-On
Most holders are weld-on pockets that are permanently attached to the auger or bucket. Some C30 holders are bolt-on, which allows replacement if the holder itself wears out. Know which system you have before ordering.
Step 5: Calculate How Many Teeth You Need

Running out of teeth mid-project is expensive. Ordering too many wastes the budget. This step gives you a reliable formula.
The Quantity Formula
Total teeth = (Teeth per tool x Number of tools) x Spare factorThe spare factor should be 1.15 to 1.20, meaning 15 to 20 percent extra. This accounts for:
- Unexpected wear in harder-than-expected ground
- Lost or damaged teeth during transport or handling
- Mid-project adjustments if you need to switch models
- Teeth that fail to seat properly during installation
Worked Example
You have two rock augers, each with 24 teeth. You are ordering for a six-month project.
Teeth per tool: 24
Number of tools: 2
Subtotal: 24 x 2 = 48 teeth
Spare factor: 1.20
Total: 48 x 1.20 = 57.6
Round up: Order 58 teeth
If your project involves multiple ground types and you may switch models mid-project, calculate each model separately and add spares for both.
Teeth Per Meter Estimates
For ongoing cost tracking, you can also estimate the consumption rate:
| Formation | Approximate Life per Tooth | Teeth per 100 Meters |
|---|---|---|
| Soft clay | 300 m | 0.3 |
| Sand/gravel | 200 m | 0.5 |
| Weathered rock | 100 m | 1.0 |
| Hard rock | 50 m | 2.0 |
| Very hard rock | 25 m | 4.0 |
These are averages. Your actual consumption will vary based on drilling parameters and tooth quality.
Step 6: Run a Field Test Before Full Commitment
Even with perfect data, ground conditions vary. A 20-meter field test validates your selection before you commit to the entire project.
The 20-Meter Test Protocol
- Install your selected teeth on one tool
- Drill 20 meters at normal operating parameters
- Remove one tooth and inspect the carbide tip under good light
What Wear Patterns Tell You
| Wear Pattern | What It Means | Action |
|---|---|---|
| Minor rounding, sharp edges still visible | Correct selection | Continue with current model |
| Flattening, loss of tip height | Ground is harder than expected | Step up to larger carbide |
| Chipping or spalling | Excessive impact or hardness | Step up to heavy-duty model |
| No visible wear | Ground is softer than expected | Consider downgrading to save cost |
| Uneven wear across teeth | Holder or alignment issue | Check holder condition and seating |
When to Adjust Your Selection
If the test shows you need a different model, make the switch immediately. Do not wait until all your initial teeth are worn. The cost of a mid-project adjustment is always lower than the cost of running the wrong tooth for the full project.
Step 7: Calculate Total Cost Per Meter
The final step in how to choose bullet teeth is comparing your options on cost per meter drilled, not the upfront price.
Cost-Per-Meter Formula
Cost per meter = Tooth price / Expected life in metersThis gives you the tooth cost component. For a complete picture, add holder wear allocation and downtime cost, but the tooth cost per meter is the primary comparison metric.
Worked Comparison
You are deciding between B47K19H and B47K22H for a 70 MPa limestone formation.
| Factor | B47K19H | B47K22H |
|---|---|---|
| Tooth price | $6.50 | $8.00 |
| Expected life | 40 meters | 70 meters |
| Cost per meter | $0.163 | $0.114 |
The B47K22H costs 23 percent more per tooth but delivers 75 percent longer life. The result is a 30 percent lower cost per meter. Over 1,000 meters of drilling, the B47K22H saves approximately $49 in tooth costs alone, plus the value of reduced downtime and fewer replacements.
Why Cheaper Teeth Sometimes Cost More
A lower tooth price is meaningless if the tooth fails twice as fast. When you factor in labor for replacement, rig downtime, and potential holder damage from premature wear, the “cheap” option often becomes the most expensive.
Common Selection Mistakes (and How to Avoid Them)

After working with contractors across dozens of projects, we see the same errors repeatedly. Here are the seven most costly mistakes and how to prevent them.
1. Choosing by price alone. The cheapest tooth per unit often has the highest cost per meter. Always calculate cost per meter before deciding.
2. Ignoring the spare factor. Running out of teeth mid-project forces emergency ordering at higher prices with express shipping. Order 15 to 20 percent spares upfront.
3. Not matching holder size. A 30-millimeter tooth will not fit a 25-millimeter holder. Verify pocket diameter before ordering.
4. Over-specifying for soft ground. Using B47K22H in clay is like using a sledgehammer on a finishing nail. The C31HD or B47K19H performs better and costs less.
5. Under-specifying for hard rock. Using B47K19H in 80 MPa rock burns through teeth, damages holders, and slows drilling. Match the tooth to the formation.
6. Mixing tooth types on the same tool. Different shank sizes, retention systems, or wear rates create uneven loading and vibration.
7. Skipping the geotechnical report. Guessing ground conditions is the fastest way to choose the wrong tooth. Obtain the report or conduct field tests before ordering.
Want to learn more about the bullet teeth series? Please check out our article on B47K, C31HD, and BK Series Bullet Teeth.
Quick Selection Checklist
Use this checklist before every bullet tooth order:
- Geotechnical report reviewed (or field test conducted)
- Primary formation type identified
- Approximate MPa range confirmed
- Tooth model matched to MPa range
- Tool type matched (auger, bucket, core barrel)
- Holder pocket diameter verified (30mm, 25mm, or 19mm)
- Retention system confirmed (circlip, spring clip, or friction)
- Teeth per tool counted
- Number of tools confirmed
- Spare factor applied (15-20%)
- Cost per meter calculated for selected model
- 20-meter field test planned
- Alternative model identified (in case adjustment is needed)
FAQ
How do I know my ground’s MPa without a report?
Use visual and field indicators. Soft clay that can be penetrated with a hand tool is typically under 10 MPa. Rock that requires a hammer to break is usually 30 to 60 MPa. A rock that rings when struck and resists a heavy hammer is likely 60 to 100 MPa. For a precise measurement, conduct an SPT or CPT test on a pilot bore.
Can I use the same tooth for clay and rock?
Technically, yes, but it is not cost-effective. A tooth sized for rock will drill clay slowly and cost more than necessary. A tooth sized for clay will fail quickly in rock. If your project spans both formations, either use hybrid arrangements or plan to swap models at the transition depth.
How many spare teeth should I order?
Order 15 to 20 percent more than your calculated total. This covers unexpected wear, handling losses, and mid-project adjustments. For a project requiring 50 teeth, order 58 to 60.
What if my ground conditions change mid-project?
This is common. Keep an alternative tooth model on-site, especially if your geotechnical report shows transitional zones. The 20-meter field test in Step 6 is designed to catch these changes early.
Should I choose by price or by performance?
Choose by cost per meter drilled. A more expensive tooth that lasts significantly longer is usually cheaper in the long run when you factor in replacement labor and downtime.
Can I mix B47K and C31HD on the same tool?
No. B47K uses a 30-millimeter shank. C31HD uses a 25-millimeter shank. They require different holders and cannot be mixed on the same tool.
How long should my first test section be?
Twenty meters is the standard test length. This is enough to produce visible wear patterns without committing a full set of teeth to an unproven selection.
Conclusion
Knowing how to choose bullet teeth is not about memorizing model numbers. It is about following a systematic process. Start with your ground conditions. Match the tooth model to the MPa range. Verify holder compatibility. Calculate your quantity with a spare factor. Run a 20-meter field test. Then calculate the cost per meter to confirm you made the right choice.
The contractors who save money are not the ones who buy the cheapest teeth. They are the ones who match the right tooth to the right formation and verify their choice in the field.
If you need help with bullet teeth selection for your specific project, contact our technical team with your ground report and rig details. We can recommend the optimal model, calculate your quantity, and provide a custom quote.