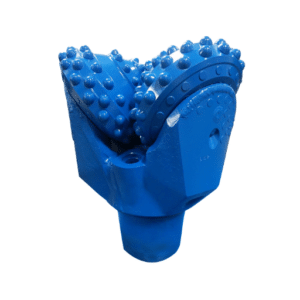
A single hour of unplanned downtime on a rotary drilling rig can cost anywhere between 125,000 and 500,000 on large foundation projects; On a smaller basis for most contractors, equipment failure causes a 5% to 10% escalation in engineering costs and 7 to 15 days on the construction schedule. The very moment your rig stops drilling, time starts ticking within each and every very minute.
The problem always lies on one’s mind: Is it hydraulic or an issue with mechanics, or is there perhaps something else underground? Questions such as these come to mind during the course of one’s operations. Different zones with three distinct problems in rotary drilling draw their highest level of problems: first, the rig itself; second, the borehole condition; and third, the drilling tools at the cutting face. If the wrong zone is known, it leads to chasing the wrong solution for hours.
Through a practical technique of troubleshooting used in rotary drilling operations, this guide enables the technician to understand how situations like rig mechanical breakdowns, hydraulic failures, operational downhole failures, and tool-specific problems are assessed, and to blame them on no one else but us. The methods are applicable to all brands of equipment, from Bauer to Soilmec or Liebherr.
When Marcus Chen’s rig hit a weathered rock last spring, the torque on the power head almost halved within minutes. Soon, the operator saw that the hydraulic motor on deck had probably failed. A senior technician hurried to the scene. He began with normal system pressure. That was okay. He looked at the reducer. A small hammer had indicated the problem on the reducer. He managed to locate the noise again, which was indeed the damaged gears in the power head box. An inspection of the reducer revealed two damaged teeth from a lens-bearing intersection. The gears were replaced and the rig was back working online before lunch. So, the lesson is, before contemplating changing hydraulic pumps or motors, check the pressure first. It saved Marcus $3,200 on unnecessary pump costs and one complete day of downtime.
How to Diagnose Rotary Drilling Problems Systematically

Fixes can be useless and cost lost time and money. Diagnosing in stages enables a structured process to be used in troubleshooting problems of rotary drilling. We propose in our analogy the application of three zones, which begin from the rig to the drilling orbit tube to the pipe.
The Three-Zone Diagnostic Method
Zone 1: Rig Mechanical and Hydraulic Systems
Pressure-check, whatever hydraulic noises or whatever other noisemakers while under a ton of additional stress, though. Most of these failures display incremental halves in this half or that. Any warning signs could be for any of these: pressure pilots go up and down, we get leaks in the oil line, or vibration arises or vibration with a change. Get hold of the rig at that moment.
Zone 2: Downhole Conditions and Borehole Stability
It all may vary between anything to the between. One must consider the slurry density, the head pressure on the water, and perhaps the behavior of the soil. This is a capacity that is equally popular in some parts along with borehole collapse, deviation, and sediment buildup. Consider that it’s some mechanical (and hence) unprecedented piece for its appearance.
Zone 3: Drilling Tool Condition and Selection
Look at the cutting teeth, bucket openings, auger flights, and core barrel cutters. Many of the under-performing engines are related to instrumentation that is not suitable for the prevailing soil condition and thus brings the rig out of equilibrium. The equipment failure rate jumps in the region of 30% when the tool is not in proper matching with the soil conditions and actions.
Field Diagnostic Checklist
Before you disassemble anything, run through these checks:
- Verify main hydraulic pressure at the power head
- Check pilot pressure consistency at different engine speeds
- Listen for abnormal knocking or whining from the gearbox
- Inspect visible oil leaks on cylinders, hoses, and fittings
- Confirm slurry density and water head levels
- Examine drilling tool teeth and cutting edges for wear
- Review recent soil condition changes in the bore log
When all pressure gauge readings are normal, and even if the rig sounds healthy, the problem should likely be within Zone 2 or Zone 3. To avoid falling into the mistake of dismantling an apparently okay hydraulic system, the real fault being a worn drilling bucket or an unstable borehole, a formidable approach is to perform this simple sequence.

Typically, rig problems segregate into definitive categories, which if understood well, enable alleviation of the root causes rather than merely treating symptoms.
Insufficient Power Head Torque
One of the most frequent problems while rotary drilling is low torque. One of these signs is that the power head is seen having a hard time turning. This is marked by poor rotation speed in both directions and noisy sounds from the motor or gearbox.
First, check hydraulic pressure. You can also install a gauge and examine the main hydraulic line. Low pressure indicates distress which should be corrected at the release-breaking valve setting and in the pilot circuit. It should be noted that a stuck relief valve and pilot pressure setting or pilot circuit may interfere with the torque delivery to the motor.
If the hydraulic pressure is fine, suspect the matter of a possible problem with the mechanical aspect. Take the motor out and inspect the shaft output. If the shaft is okay, dismantle the gear reducer inside a clean environment. Look for teeth broken from the gears, a worn bearing, or metal debris in the lubricating oil to give you an idea. Replace the damaged gear and bearing, and fill it with the recommended lubricating oil from the manufacturer.
Intermittent hammering from the reducer is an early warning of gear failure. Don’t long for a full outlay. Do something about the first sound.
Rotary Vibration and Unstable Rotation
The harsh vibration at low RPM, mild vibration at high RPM, and fluctuating main pump pressure imply its rotation system is awry.
Start by checking pilot pressure at different engine speeds. With inconsistent pilot pressure, the rotation relay or solenoid could be the one at fault. Test other hydraulic functions. The pump must be the main pump or the pilot pump itself. The simple solution is to replace both to allow the rotation to stabilize.
Following this diagnostic step saves an owner from the expensive mistake of replacing an entire rotating motor when the pump is what was, in fact, at fault. It saves parts and labor.
Mast Cylinder Oil Leaks and Misalignment
Visible hydraulic leaks or an upright mast that is not staying up would suggest shoddy seal mechanisms or some valve malfunction.
Look at the mast from pistons with a critical eye. Check the condition of the rod surface. Identifying grooves, blotches, or mellow damage is important. Undoubtedly, wire rope contact is another source of rod scoring, which destroys seals at an accelerated pace. Substitute seals, O-rings, and fiber gaskets, and then re-route the wire rope to prevent further contact.
Main Winch Abnormal Drop
When the primary winch disallows the drill string to drop suddenly just after starting up, the braking operation is likely to be defective and needs to be looked at straightaway.
Generally, the brake circuit is blocked to the actuator to check; if it lifts, the friction plates are likely to be in good shape. Depending on the pressure differential signal, the failure to act is caused by other complications such as steering solenoid operation and supply pressure but the first culprit should be checked. A gauge is used for this initial assessment on effects. Instruments and pressure differences from normal could mean a blockage of one of the reliefs.
Rope Press Seizure
A press holding the rope rod with the mast not rotating causes excessive wear and increases the risk of the rope.
Disassemble the press rope clamp when seized. In a nutshell, blockage typically results from poor lubrication or worn bearings. Replace the bearings that have locked, reassemble the entire thing in accordance with the OEM, and then grease it well as indicated by the maintenance schedule. Regular greasing would dramatically decrease the number of rope press failures.
Downhole Operational Problems

Rotary drilling troubleshooting begins not at the rig, but very often some factors pertinent to the hole are the actual cause of the failure; as such, the operator typically misunderstands this issue as a breakdown.
Borehole Collapse
Borehole collapse usually means shell rupture, sudden slurry level increase followed by its drop, boiling inside the casing, or signal trashy drill string.
Keep the positive water head pressure or increase it immediately. Remove or reduce any heavy loads or vibrations near the hole that may destabilize the hole walls. Use a mud pump to clear away trash from the collapse in the borehole.
Vertical deviations or crooked sections from a borehole of a pile point must be taken seriously.
When deviation in any zone is notably noticed, stop the borehole at the point of deviation and ream repeatedly through the zone; in cases of extreme deviation, backfill with soil that has good cohesion, let it densify, and then redrill. On rocky, uneven surfaces, start boring the hole with either a rock bucket or a pilot bit rather than using a double-bottom sand bucket. The less resistance tends to keep the hole on course
Necking, that is, the reduction of a bit’s diameter, as the case usually arises, is by expansive soils that absorb water or weathered tooling. Use a high quality, low filtration drilling slurry in clay ranging into mudstone. Check regularly the wear of drilling tools and repair cutting edges using hard facing or welding. Ream through the area before proceeding.
While a team in Guangdong province was consistently losing track while drilling weathered granite using sand buckets, they replaced the sand bucket with a rock bucket with a centralized pilot tip. They also welded a 2m guide guard cylinder on the drill pipe. Over infinite boreholes, the drilling deviations dropped from 1.8% to 0.4%. Equipment that a worker deems as right can come out for solving the problem every time.
Bit Balling and Stuck Drill Tools
Cuttings that form clumps around the bit and hinder material discharge are termed bit balling, which in turn adds resistance to drilling.
First, slurry viscosity has to be analyzed. The cutting must be spun around the bit as the bit gets worn down. Investigate the cutting and flow paths and removal equipment. Slowing down will allow good cleaning. If the balling is serious, the bit has to come out completely, cleaned and the parameters adjusted.
If a tool gets stuck in a hole during drilling, never pull it out forcefully to bring it on surface. Try using gentle lifting, to check that there would be a smaller impact hitting the side free, or with a combination of impact and suction methods. If the tool manages to lose, pull it up slowly. Any effort just to pull it out strongly will damage the kelly bar, any winch of the rig, and the tool itself.
Excessive Sediment at Pile Tip
Another one is the incorporation of sand into the stabilization fluid or a poor cleaning operation during drilling, which leaves sediment at the pile base. The viability of the pile’s end-bearing capacity is ruled out, while the pile is also suspected to have no integrity attainable.
Good management of the slurry is required prior to the concrete pour. Not so much left to do upon the use of a cleaning bucket aimed at debris removal. As with other activities, the contractor can repetitively void what should be done, and, in this instance, ends up being added and altered.
Drilling Tool-Specific Troubleshooting

Rotary Drilling Bucket Issues
Poor penetration, tooth wear and material discharge are common bucket-related drilling problems.
In hard formation, penetration may slow down due to wear out of bits itself but inefficient or bad cutting action against soil. Straight-edge earth-cutting buckets of soil will probably not work in hard rock. In such circumstances, manual rock drilling buckets should have been fitted with carbide-reinforced cutting teeth. Largest opening buckets are encouraged for the quick release of the material and/or its packaging in moving sands.
Rapid tooth wear may occur due to very abrasive conditions or improper tooth design. Tooth inspection should be done at the end of every shift. It can be observed that the bullet teeth or cutting edges are worn out and before it overloads the rig, it is better to replace them. High-quality reporting materials extend the service life of the teeth. Our drilling buckets are made with premium alloy steel and replaceable tooth systems for cost recovery at ease.
The cause of material discharge issues in burely, impaired soil retention construction also lies in insufficient opening outlets and another application for building up of clay. By handling the bucket with better understanding, production should contemplate a high-capacity, double-bottom drilling bucket for the sticky soils.
Auger Problems
Augers bind, bend, and seize in ways that differ from bucket issues.
A bound auger usually results from overdrilling. While borehole cuttings jam up between the auger blades and the borehole wall, they may be allowed to spin out as broken material. Do not overdrill; just cut out when they are discharged from the top of the barrel. Try a reverse rotation while applying an upward force “squeeze” to facilitate removing the auger from its binding.
Bent blades are traced from running the auger into a hanging binder on resistance. These tend to stress the welds holding the filters on the flight. The flight batches should be thoroughly examined for distortions, such as broken welds, misfits, or disconnected fasteners. Such flights should be replaced promptly as long as they are cracked or cut.
Failures of hydraulic drives on attachment augers are usually from oil contamination or low planetary gear oil. Keep hydraulic oil clean; likewise, be sure dust caps are in use on quick-connect fittings. Planetary gear oil levels must be checked when the drive is tilted to approximately 30 degrees from vertical. Change gear oil at the first 500 hours, thereafter every 2,000 hours using an API-GL-5 85W-140 rated gear oil.
Core Barrel Failures
Core barrels present unique challenges, especially in hard rock and saturated formations.
If core loss is due to soft or errant formations, chances are that the mechanism of the core catcher did not grip the core. The best course of action is to examine the latches, basket or split ring before going downhole. A double-tube core barrel will isolate drilling fluid from the cores and will resist washout in soft sand. If you are losing cores on a regular basis, changing the barrel type is usually much quicker than playing around with drilling parameters to make it work.
Barrel sticking results from material built up inside the barrel of the core bit or rocks that have become wedged in the barrel. Clean thoroughly after each run considering any distortion or possible damage to the barrel causing sticking. Store in a clean, dry, protected manner.
Cutter wear in hard rock cuts into penetration and raises heat. Looking into fused or welded cutting teeth after each run may provide some answers to the matter. It is a power reduction to lessen heat damage by reducing RPM and bit weight. Use cooler dramas and nozzles in drilling fluid for keeping the bit cold.
Kelly Bar Damage
Telescopic kelly bars suffer wear that is easy to overlook until failure occurs.
Regularly inspect Kelly bars for cracks, deformation, rust, and wear on the drive keys. Clean the telescopic sections. Contamination between sections leads to binding and accelerates wear. Match the Kelly bar type to the soil conditions, which require interlocking Kelly bars for higher torque in rock. Contracting Kelly bars are effective in stable soil but can slip under heavy loads.
Do not overload the Kelly bar beyond its rated working torque. Overloading will twist the bar or strip the drive keys and require expensive repairs and significant downtime.
Preventive Maintenance to Avoid Costly Breakdowns
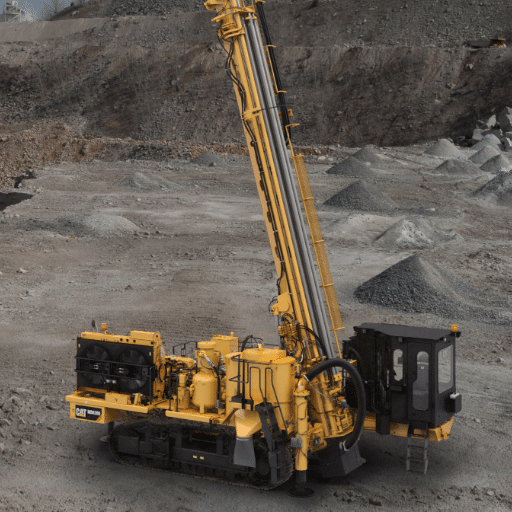
Definitely, the solution to the best rotary drilling troubleshooting problem is preventing the problem. Preventive maintenance prevents up to 30% of equipment breakdowns. Since the incidental cost of a breakage is roughly 24 times the cost of immediate repair, any prevention pays.
Daily Inspection Checklist
Before starting each shift, inspect the following:
- Kelly bar for cracks, deformation, and rust
- Rotary head housing for cracks and bolt tightness
- Hydraulic hoses and fittings for leaks
- Drilling tool teeth and cutting edges for wear
- Track bolts and undercarriage condition
- Wire rope condition and lubrication
- Mast and frame welds for fatigue cracks
The immediate Kelly bar, maintenance should be done by changing worn teeth. If a Kelly bar is used with a dull tooth, this forces the rig to apply more torque, which stresses the power head, forks, and hydraulic system.
500-Hour Maintenance Protocol
Every 500 operating hours, perform a detailed service:
- Check all hydraulic connections and test pressure at the pump outlet
- Inspect internal gearbox components for wear
- Service lubrication levels on the rotary head, winch, and rope press
- Check brake pad thickness and balance valve function
- Inspect structural welds on the mast and frame
- Verify torque settings on all critical fasteners
Climate and Soil Condition Adjustments
According to the climatic conditions, choose the corresponding hydraulic oils. Thinner varieties work well in icy conditions, while in hot regions, hydraulic fluids are available that can withstand high temperatures.
Use payable details for these harsh formations. Sandstone and gravel set up wear on teeth and cutting edges. Check them more in these situations. Use hardfacing materials and wear blades in abrasive soils.
Spare Parts Strategy
Have critical spare parts on a physical record: seals, O-rings, cutting teeth, and hydraulic hose. Failure of a seal in a faraway location could halt a rig for days, given the need to transport the part from a faraway warehouse. With older rigs or used rigs, double-check the availability of spare parts before problems occur.
If replacing your tools is frequent despite the description given, the possible cause may not be maintenance but material quality. Obviously, more durable, wear-resistant tools last longer and require lower amounts of spare parts.
Conclusion
Rotary drilling troubleshooting works best when you approach it systematically. Start with rig hydraulic and mechanical checks. Move to wellbore conditions. Finish inspection of the drilling implement. Misdiagnosing the zone costs time and money.
The key takeaways are simple:
- Check hydraulic pressure before disassembling mechanical components
- Never force a stuck drill tool upward
- Match drilling tools to soil conditions to prevent problems before they start
- Replace worn cutting teeth promptly to avoid overloading the rig
- Follow a daily inspection checklist to catch failures early
With most of the drills not working, equipment downtime can cause financial loss, while prompt attention will resolve almost all rotary drilling issues with the appropriate approach. These methods can easily approach dealing with power head torque loss, borehole deviation, or stuck core barrel.
Should you need help in selecting the right drilling tools for your soil conditions or seek any technical guidance for a recurring problem, get in touch with Changsha Mingyi Machinery Equipment Co., Ltd. Our engineering team supports contractors worldwide with durable, customizable drilling solutions that are imagined from real-world situations.